Category: Commercial Plumbers

4 Plumbing Quick Fixes You Should Learn

>

When a pipe bursts or an appliance starts to leak, you can’t always afford to wait for a plumber. Water damage will take its toll quickly. Knowing a few basic but important plumbing quick fixes can make a big difference in how you recover from a plumbing disaster.

Here are some easy repairs you can perform to minimize damage before your local smell good plumber arrives on the scene. These simple stop-gap solutions may not sound like much, but they could save you money and spare your home from greater catastrophe.
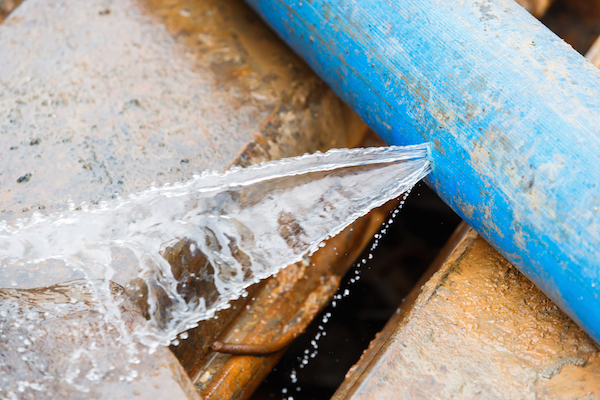
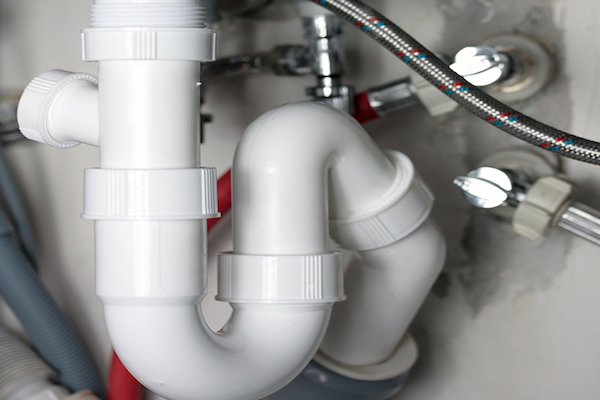
leaking pipe quick fixes
Leaking Pipe

No matter how small a pipe leak is, you don’t want water pouring out into your home. Even small drips can develop into big problems. Luckily, there are plenty of home plumbing tools designed to help you make quick fixes to prevent disaster.

Whatever method you go with, start by turning off the water. and measuring your leaking pipe’s circumference.

How to turn off the water

To turn off the water to a leaking pipe locate the nearest shut off valve. Sinks and toilets will have a small knob underneath where the water supply connects. Showers and tubs often have an access panel on the opposite side of the wall. Simply turn the shut off valve counterclockwise to stop water from flowing.

If your leak is not located near a local shut off valve, you may need to turn off the water to your entire home until the leak is addressed. Locate your water main where the city water supply enters your home. It will have a knob or lever type valve where you can shut off the water supply into your home.

 The right repair supplies

Your nearest hardware store should have what you need to temporarily stop leaking pipes until they can be replaced. If you have iron pipes, purchase an epoxy compound. If you have copper, PVC or other, purchase a pipe clamp or wrap.

To repair a leaking iron pipe: Apply epoxy directly onto the leaking pipe, like you would with caulk or plumber’s putty. The epoxy will temporarily form a seal over the leak.

To repair leaking PVC or copper pipes: Affix the pipe clamp or wrap around the leak. The pressure should hold in the water until you can get the pipe replaced.

Remember that none of these three products offer a permanent solution. While they function admirably as quick fixes, the only foolproof way to be rid of a plumbing leak permanently is to replace the pipe.
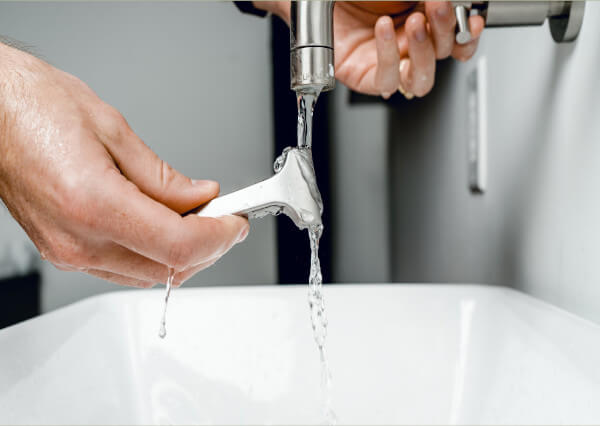
leaking pipe joint quick fixes
Leaking Pipe Joint

Leaking pipe joints are a little trickier than normal pipe leaks. The angle of the joint can make quick repairs awkward or ineffective. Luckily, there are a few tools designed specifically for administering quick fixes to vexing leaks like these.

Repair sleeves and rubber pipe connectors are flexible enough to wrap around a leaking joint and will press in on it to squeeze water back through the pipe.

To use a rubber pipe connector or repair sleeve: Measurement is important here. Cut rubber pipe connectors so they fit tightly around the leak. The rubber of the connector resists water if it’s wrapped tightly enough, but it won’t last forever. Repair sleeves work well on smaller joint leaks. Add a clamp over your rubber wrap to hold it in place.

Over time, however, the leak may grow wider than the sleeve. In a real pinch, you could supplement either of these tools with duct tape, but keep in mind how temporary a solution it would be.
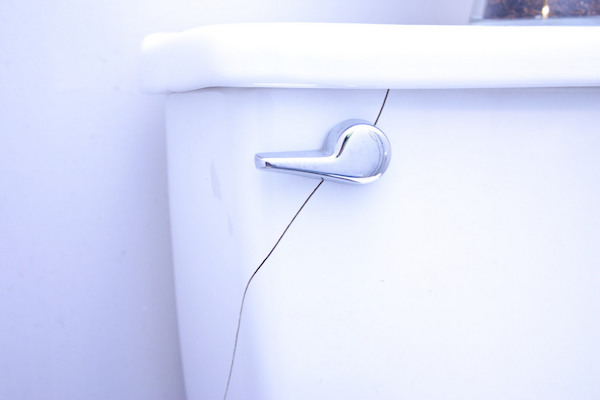
cracked porcelain quick fixes
Cracked Porcelain

Toilets, bathtubs, sinks, and showers can crack or break just like anything else. Unlike everything else, however, these appliances are sometimes full of water. It’s easy to panic if the bottom of your toilet cracks open and starts flooding your bathroom. In cases like these, you’ll want to prevent the leak from damaging the floor as quickly as possible.

This is where our old pal plumber’s putty comes in. First, apply plumber’s putty to the inside of the leak. Try to squeeze it in as snugly as possible. Plumber’s putty naturally resists water, so it should hold for long enough. After you’ve squeezed the putty in as much as you can, apply caulk right over the top of it. The caulk will help form a secondary seal and lasts longer than plumber’s putty will, but it would be hard to put on without the putty. Neither the caulk nor the putty will last forever, however, so consider having your toilet, sink, or tub replaced soon after.
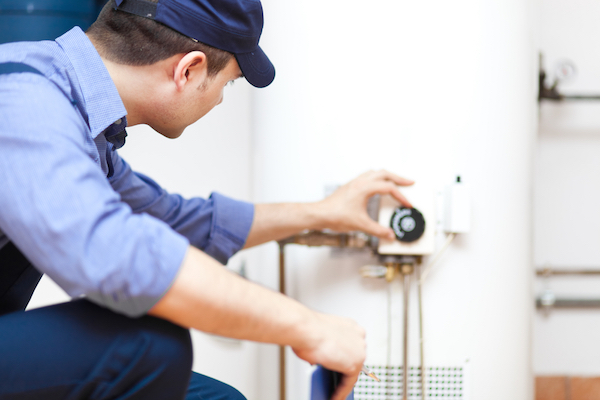
Faulty water heater quick fixes
Faulty Water Heater

If your water heater isn’t working well, it’s likely that sediment has collected in the tank. When a layer of sediment builds up at the base of a water heater tank, it blocks the heating element. The water heater wastes time and power trying to heat through the sediment. You don’t get hot water as quickly, and your water heater becomes strained. All water heaters need to be replaced eventually but flushing your tank can extend its lifespan significantly.

To flush your water heater

First, turn off the water heater. Run hot water in a sink for about 10 minutes to drain the tank of hot water. Shut off the cold-water supply on top of the tank, and then attach a garden hose to the drain valve. Make sure the hose leads to the nearby floor drain. Re-open the cold-water supply WITHOUT closing the drain valve or disconnecting the hose. Watch the water drain until you can’t see sediment discoloration in it.

For Plumbing Emergencies in L.A.

Try these quick fixes for any of the above plumbing emergencies and then call us right away. We can fix your emergency quickly, effectively, and permanently. Mike Diamond has been on the Los Angeles scene stopping all manner of home plumbing problems since 1976.

The post 4 Plumbing Quick Fixes You Should Learn appeared first on Mike Diamond Services.

Did you miss our previous article…
https://www.ab-sessions-plumbing-building-services.com/?p=658

Tips to Help Manage Your Plumbing Business

Starting a business could be an exciting venture, especially if you decide to join the plumbing business, whether you’re a commercial, residential, or industrial. Unfortunately, many people think that running a plumbing business is difficult, but this is not true.  You will be able to handle the work of the plumbing business by yourself, and […]

The post Tips to Help Manage Your Plumbing Business appeared first on Plumbing Perspective | News, Product Reviews, Videos, and Resources for today’s contractors..

Did you miss our previous article…
https://www.ab-sessions-plumbing-building-services.com/?p=642

Dearborn True Blue Bath Waste Kits Now Available in Brushed Gold, Expanding Design Compatibility and Versatility 

Dearborn®, a part of the Oatey family of brands, today announced that its True Blue® Bath Waste Kits are now available in a fashion-forward Brushed Gold finish, adding to its already robust line of designer finishes. Innovative, flexible and designed with the plumber in mind, the True Blue Bath Waste line is made with integrated […]

The post Dearborn True Blue Bath Waste Kits Now Available in Brushed Gold, Expanding Design Compatibility and Versatility  appeared first on Plumbing Perspective | News, Product Reviews, Videos, and Resources for today’s contractors..

Did you miss our previous article…
https://www.ab-sessions-plumbing-building-services.com/?p=637

What’s That Smell in My Kitchen?

Do you have a mysterious, unpleasant odor in your kitchen? Something that doesn’t go away, no matter how many times you mop or take out the garbage? Check your kitchen sink.

Your kitchen sink might be the hardest working plumbing appliance in your home. If there’s a problem with it, chances are the food you run through the disposal or the grease you rinse off dirty plates isn’t getting properly removed from your house.

When food or grease gets caught in your kitchen sink’s pipes, it begins to rot. Rotting food or other debris can produce terrible smells and become a breeding ground for bacteria and pests. Even if you don’t have a disposal, the kind of stuff that drops down the kitchen sink’s drain can collect and start to smell surprisingly quickly. If your kitchen sink has a sour odor that you just can’t scrub away, here are a couple possible explanations and what you can do about it.

Grease on plate
Grease in the Drain

If you pour cooking grease or vegetable oil down your kitchen sink’s drain, it can congeal to the sides of the drain, disposal, or lower pipe. Then, the grease starts to decompose and trap other falling debris. Soon, an unruly rotting smell wafts back up out of the sink and into your kitchen.

Scoop about a cup of baking soda into your kitchen sink’s drain. Follow that up with about as much vinegar, then let it sit for about ten minutes. While the mixture is doing its thing, boil a pot of water. When ten minutes have passed, pour the boiling water into the sink. The baking soda and vinegar should foam up and eat away the grease in your drain, and then the boiling water will flush it all out.

Garbage disposal
Dirty Garbage Disposal

Sometimes, scraps of food or other gunk can catch on your garbage disposal’s blades. That food rots and starts to smell. Problems increase if:

You use your garbage disposal often.You run hot water with it.,You run no water.Your garbage disposal is older.

Grab about two cups of ice cubes and a cup of salt. Turn on the kitchen sink’s cold water and run the disposal for about 20 seconds. After that, dump the cups of ice and the salt into the disposal. Let the disposal keep running until all the ice cubes are gone. Cutting up the ice in cold water should have helped clear away the gunk caught on the blades.

For extra odor prevention, drop lemon, grapefruit, or orange rinds down the disposal while you’re running it with the ice. You can also add lemon juice and vinegar.

Kitchen p-trap
Problem with the Trap

If your kitchen sink smells more like sewer than rotten food, there might be a problem with its trap. A kitchen sink’s trap is the ‘P’ or ‘U’-shaped pipe directly beneath the sink basin. The trap’s job is to prevent sewer gas from drifting from the pipes back up into your house. It’s also handy for recovering lost wedding rings.

Usually, a sewer smell means that the water in the trap that blocks sewer gas has evaporated. This can happen if the sink hasn’t been used for awhile. If that’s the case, all you should have to do is run the sink and let the water fill back up in the trap. Watch the trap while running the water to make sure it isn’t leaking.

If that doesn’t fix the problem, take the trap out, empty it, scrub it down with an old toothbrush and a cleaning agent, and replace it. Clogs can build up in kitchen and bathroom traps. They may need to be cleaned periodically but if the problem persists, give us a call.

Roof vents
Clogged Vent

If there’s a sewer smell coming from your sink and you don’t think the trap is the problem, the next most likely culprit is the vent. The plumbing drain vent is basically a long, narrow, vertical shaft connecting your main sewer line to the outside air. This shaft vent stabilizes the pressure inside the pipe connecting to your sewer. Without it, water may siphon out of your sink’s trap, letting sewer gas in.

Plumbing vents are located on the roof of the house. When they’re not working, it’s usually because something is obstructing it, such as a bird’s nest or a piece of debris. There could also be a leak in the vent’s shaft, which would interfere with its pressure mitigation or could even let sewer gas into your house. In either case, you may want to consider calling a professional. Clearing a vent obstruction may not sound like a big job, but roof jobs are always trickier than they seem.

 Keeping L.A. Smelling Good

If your kitchen sink smells, hopefully one of these quick fixes solves the problem. If the stench is coming from a simple clog, try plunging with a cup plunger.

If you’ve tried everything and you’ve still got a bad smell, give us a call. There’s more than one reason Mike Diamond is your “Smell good plumber.” With our pipe cleaning technology and years of experience, we guarantee we’ll find and solve your problem and get your kitchen smelling fresh again.

The post What’s That Smell in My Kitchen? appeared first on Mike Diamond Services.

Did you miss our previous article…
https://www.ab-sessions-plumbing-building-services.com/?p=617

How Do I Determine The Right Size Furnace For My Home?

>

When it’s cold outside (even in LA), you need the right furnace to heat your home evenly and efficiently. A furnace can only do its job properly if it’s the right size for the space it’s heating. Too big and it will switch on and off frequently, too small and it will run constantly. Neither is ideal.

A small furnace will lead to high energy bills, uneven heating, and a shorter lifespan. Not to mention the fact that you’ll probably still be cold. A furnace that’s too big, on the other hand, might make parts of your home uncomfortably hot while leaving other areas unproperly heated. This constant cycling in short bursts could wear it out quickly. To avoid these problems, learn how to choose the right sized furnace for your home.

How do I determine the right size furnace for my home?

Gas furnaces are differentiated by their BTU capabilities. BTU stands for British Thermal Units. One BTU represents the amount of energy required to heat one pound of water by one degree Fahrenheit. To determine the proper BTU you’ll need for your home’s heating, you’ll have to do a little math.

First, find out the square footage of your home. 

You should be able to find this number on the paperwork you received when you purchased your home. If you can’t find that, you can calculate the square footage yourself.

Start by measuring the length and width of each room in your home. Multiply the length and width of each room together to get the square footage of that room. Then simply add together the square footage of all your rooms.

Don’t include rooms that don’t have ductwork or rooms you don’t plan on heating, like garages or sunrooms. Most furnace size charts operate under the assumption that your ceilings are eight feet high. If your ceilings are higher or lower, make changes to your calculation accordingly.

Determine which climate zone you live in. 

The United States is divided into different climate zones, each with its own BTU per square foot recommendation. To heat a home in Minnesota takes more BTUs than a home in Florida. Living in California, your furnace won’t have to be heavy duty.

If you’re working with Mike Diamond, then your home lies in Zone 2 – a hot-dry or mixed-dry climate zone. In Zone 2, you need 35-40 BTUs for each square foot of your home.

Calculate the furnace size you’ll need. 

To determine the number of BTUs you need to heat your home: multiply your square footage by the zone heating factor. If your home is well insulated, use the lower number. If your home is not well insulated or has other factors that may make it harder to heat, use the higher number.

For example: in a well-insulated L.A. home that is 2,000 square feet our equation is:

2,000(sq ft) X 35 (zone factor) = 70,000 BTUs

For this home, we need to install a furnace with a rating of 70,000 BTUs. But we have one more step to finding our perfect furnace.

Calculate your new furnace’s actual output.

When you shop for your new furnace, you’ll notice two numbers on it. The first is the amount of heat it will produce in BTUs. The second number is its efficiency rating. To calculate the actual BTU output of any furnace, multiply the two numbers. For example, a furnace capable of 100,000 BTUs at an efficiency rating of 80% will actually produce 80,000 BTUs of heat:

100,000 X 80% = 80,000

Make sure you calculate this properly before installing a furnace that is too small for your space.

Reference a furnace size chart. 

You can also compare your home’s square footage to a furnace size chart. There are a number of different furnace size charts out there. These charts give comparisons between home square footage and the BTUs needed to heat it. It’s not as accurate as calculating it yourself. Most charts follow guidelines similar to these:

A 1,200-square-foot home will require between 35,000 and 75,000 BTUs A 1,500-square-foot home will require between 45,000 to 90,000 BTUs A 1,800-square-foot home will require between 55,000 to 110,000 BTUs A 2,100-square-foot home will require between 65,000 to 125,000 BTUs A 2,400-square-foot home will require between 75,000 to 145,000 BTUs

Expert Furnace Service and Installation in Los Angeles

If you’re interested in updating or upgrading your home’s furnace, give Mike Diamond a call. Our expert technicians can answer your questions about the make, model, and size of the perfect furnace for your home. We’ll be able to get your just right furnace installed quickly and efficiently.

The post How Do I Determine The Right Size Furnace For My Home? appeared first on Mike Diamond Services.

Did you miss our previous article…
https://www.ab-sessions-plumbing-building-services.com/?p=594