
Plumbing is essential in the construction of homes, buildings and commercial spaces. It ensures that there is an adequate supply of potable water and a means to get rid of waste.
The basic principles of plumbing are gravity and pressure. It also involves the use of pipes, valves, fixtures and tanks. Contact Holmes Plumbing and Drain now!
The water supply is the infrastructure for the collection, transmission, treatment, storage, and distribution of drinking water and water used in commercial establishments, industry, irrigation, thermoelectric power generation, mining and other agricultural activities, and public uses such as street washing and fire fighting. The water is typically obtained from surface sources such as lakes and rivers, or groundwater sources such as wells.
Increasingly, the supply of water has become a political issue due to climate change-induced shifts in precipitation patterns and increased recognition that taking too much water from rivers and streams damages aquatic ecosystems. This has resulted in a growing emphasis on capturing rainwater to avoid relying on piping in water from long distances.
A wide variety of institutions have responsibilities in the area of water supply, including municipal governments, regional governments and government agencies, state departments of environmental protection, utilities companies, private businesses, and nongovernmental organizations. The water supply is a vital service and can be delivered in various ways, depending on local conditions.
Public water-supply systems generally operate as utilities. They collect data on water-supply withdrawals from their sources, and on the delivery of water to their customers. This information is normally reported to State regulatory agencies, and a State’s department of public health may also be involved. The information that is available on these services varies from State to State, but typical data include the rate of water-supply withdrawals, deliveries to other public water suppliers (wholesale), and deliveries to domestic, commercial, industrial, thermoelectric, and irrigation users (retail), and estimated unaccounted for use.
The distribution network is normally pressurized, to ensure that all parts of the network receive a sufficient flow and that water reaches them without being lost in pipes or otherwise wasted. The system is typically designed to optimize operational performance, with respect to pumping costs and pressure losses, using pipe network analysis methods.
Distribution networks are often constructed in a gridiron or circular (ring) arrangement. This allows for a large number of water outlets and permits the replacement of any isolated section of the network without disrupting all other consumers.
Drainage
Drainage is the process of taking away waste water and sewage from your home. All drainage pipes are angled downwards to make use of gravity to constantly carry wastewater towards the sewer line, where it eventually ends up at a local sewage treatment plant or septic tank.
There are different types of drains for each fixture in your home. For example, kitchen sinks have open drains that allow food particles to wash down the drain while bath and shower drains have a P-shaped trap that holds back soap scum and other solid matter. The drainage system also includes venting piping, which allows air to circulate through the drains and prevent them from becoming clogged by solid matter or excessive pressure.
The drainage system also includes gutters and surface water drains that take in rainwater for reuse or direct it to rivers, beaches and lakes. It’s important to have separate drainage systems for rainwater and wastewater, as mixing the two can cause significant environmental damage.
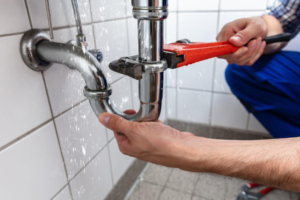
If you’re having plumbing issues, like a leaky pipe or a clogged drain, it’s important to find a plumber who is familiar with your type of plumbing system. An experienced plumber will be able to diagnose the issue and fix it quickly and efficiently, so you don’t have to deal with the consequences of a damaged or malfunctioning drainage system for too long.
All drain pipes should be designed and installed to ensure they can withstand the load of a building, as well as meeting basic hygienic design principles. For instance, gully bodies should be located as close to trafficked floor areas as possible, and their size should be based on their anticipated volume, cleaning regime and bacterial reservoir capacity. In addition, the choice of drain materials should be based on the structural and operating characteristics of each. The use of corrosive or acidic chemicals should be minimized as they can erode the insides of drain pipes and increase their risk of corrosion and deterioration. For more information on drains and their connections, read our Plumbing Guide. You can also check your drains for misconnections by downloading, distributing or printing our Drainage Misconnections Leaflet.
Waste Disposal
Waste disposal is the process of removing, discarding or recycling unwanted materials. It is important to dispose of waste correctly because it can pollute the environment and cause health problems for people. Improper disposal methods can lead to water, soil and air pollution. These include open burning, which can emit toxic fumes and smoke, and dumping waste into rivers or land depressions. These practices can also result in harmful chemicals leaking into groundwater and surface water sources.
Sanitary landfills are pits with impermeable synthetic bottom liners where garbage is separated from the rest of the environment. Another common method is incineration, which involves combusting solid organic waste to produce energy and ash. This reduces the volume of waste by 80 to 95 percent. However, it produces carbon dioxide, sulphur dioxide and oxides of nitrogen, which contribute to global warming.
Liquid waste disposal is more difficult than solid waste, because liquids can seep into the earth and contaminate groundwater and surface water sources. This can cause gastrointestinal illnesses and heavy metal poisoning, depending on the composition of the waste. Ideally, liquid waste should be disposed of in designated areas far away from residential homes. This is because the chemicals in the waste can contaminate drinking water supplies and make people ill.
Despite the benefits of proper waste disposal, many companies are reluctant to implement these procedures. They often fear the cost and public relations implications of having to pay for disposal services. However, a company that invests in waste disposal can save money by eliminating the need for costly cleanups and repairs caused by hazardous wastes.
In addition, companies that use waste disposal methods that reduce the volume of waste can lower their insurance costs. They can also benefit from the tax deductions and other incentives that are offered by the government.
Moreover, the benefits of waste disposal are even greater for businesses that operate industrial plants and have a large amount of contaminated debris to dispose of. These businesses can benefit from the waste reduction and disposal strategies used by municipal governments.
Sanitation
Sanitation involves the collection, transportation, treatment and disposal of human excreta (feces) and wastewater and preventing direct contact between people and this waste. Sanitation technologies may involve centralized civil engineering structures like sewer systems, sewage treatment plants and solid waste landfills or they may be relatively simple onsite sanitation systems such as pit latrines, ventilated-improved pit latrines, septic tanks and composite toilets.
In the latter case, sanitary facilities connect to fecal sludge management systems where fecal sludge is either treated on site or transported offsite for treatment. The term sanitation is often used synonymously with water supply, but proper sanitation requires all four of these components – piped drinking water, wastewater, drainage and solid waste management.
To ensure that a plant is adequately cleaned and sanitized, it is important to have written procedures for each task in the operation. These should be clearly explained to all workers and emphasized during training. Also, material safety data sheets must be available for all cleaners and sanitizers. Finally, all areas and equipment must be thoroughly rinsed with clean, potable water before use. This rinse is followed by a sanitizing solution to reduce the number of microorganisms present or hidden on surfaces. This process should be repeated on a regular basis to ensure that all contaminants are controlled.